So, you've got a website, and you're ready to dive into the world of digital analytics. Good for you! With Google Analytics 4 (GA4), you can obtain some seriously powerful insights into how people interact with your site. Enhanced Measurements in GA4 kicks it up a notch by automatically tracking events such as page views, scrolls, outbound clicks and more. This guide will walk you through the setup, ensuring you’re armed with the data you need to make smart marketing decisions.
What are Enhanced Measurements?
Definition and Purpose
Enhanced Measurements in Google Analytics 4 (GA4) are a revolutionary way of tracking your website's interactions without needing to dive deep into heavy coding or relying on manual event tagging. In a nutshell, it's Google's way of making data collection smarter and more automated. The primary purpose is to streamline how marketers and website owners collect essential data points. This means less guesswork and more precision when it comes to understanding how users engage with your site..webp)
Benefits of Using Enhanced Measurements
Why should you care about Enhanced Measurements? Well, for starters, they're designed to save you a ton of time and potentially a few headaches. Here's what makes them a game-changer:
- Automation: Automatically tracks key interactions like page scrolls and outbound clicks. No manual setup required!
- Comprehensive Insights: Get a fuller picture of user behavior, which can translate into better marketing decisions.
- No Additional Coding: Forget about having to tweak your website's code every time you want to track something new.
- Real-Time Data: Everything's tracked and updated in real-time. You're always in the know.
.webp)
Examples of Data Captured with Enhanced Measurements
The beauty of Enhanced Measurements lies in its ability to capture diverse data points, effortlessly. Here's a sneak peek into what it can track:
- Page View: Every time a user lands on a page, it's logged.
- Scroll Tracking: Identify when a user scrolls to the bottom of a page, indicating high engagement.
- Outbound Clicks: Track clicks that take users off your site, which is crucial for partnership analytics.
- Site Search: Capture what users are searching for internally, offering insights into user intent.
- Video Engagement: Automatically gather data on how users interact with your embedded videos.
Setting Up Google Analytics 4 Enhanced Measurements
Creating a New GA4 Property
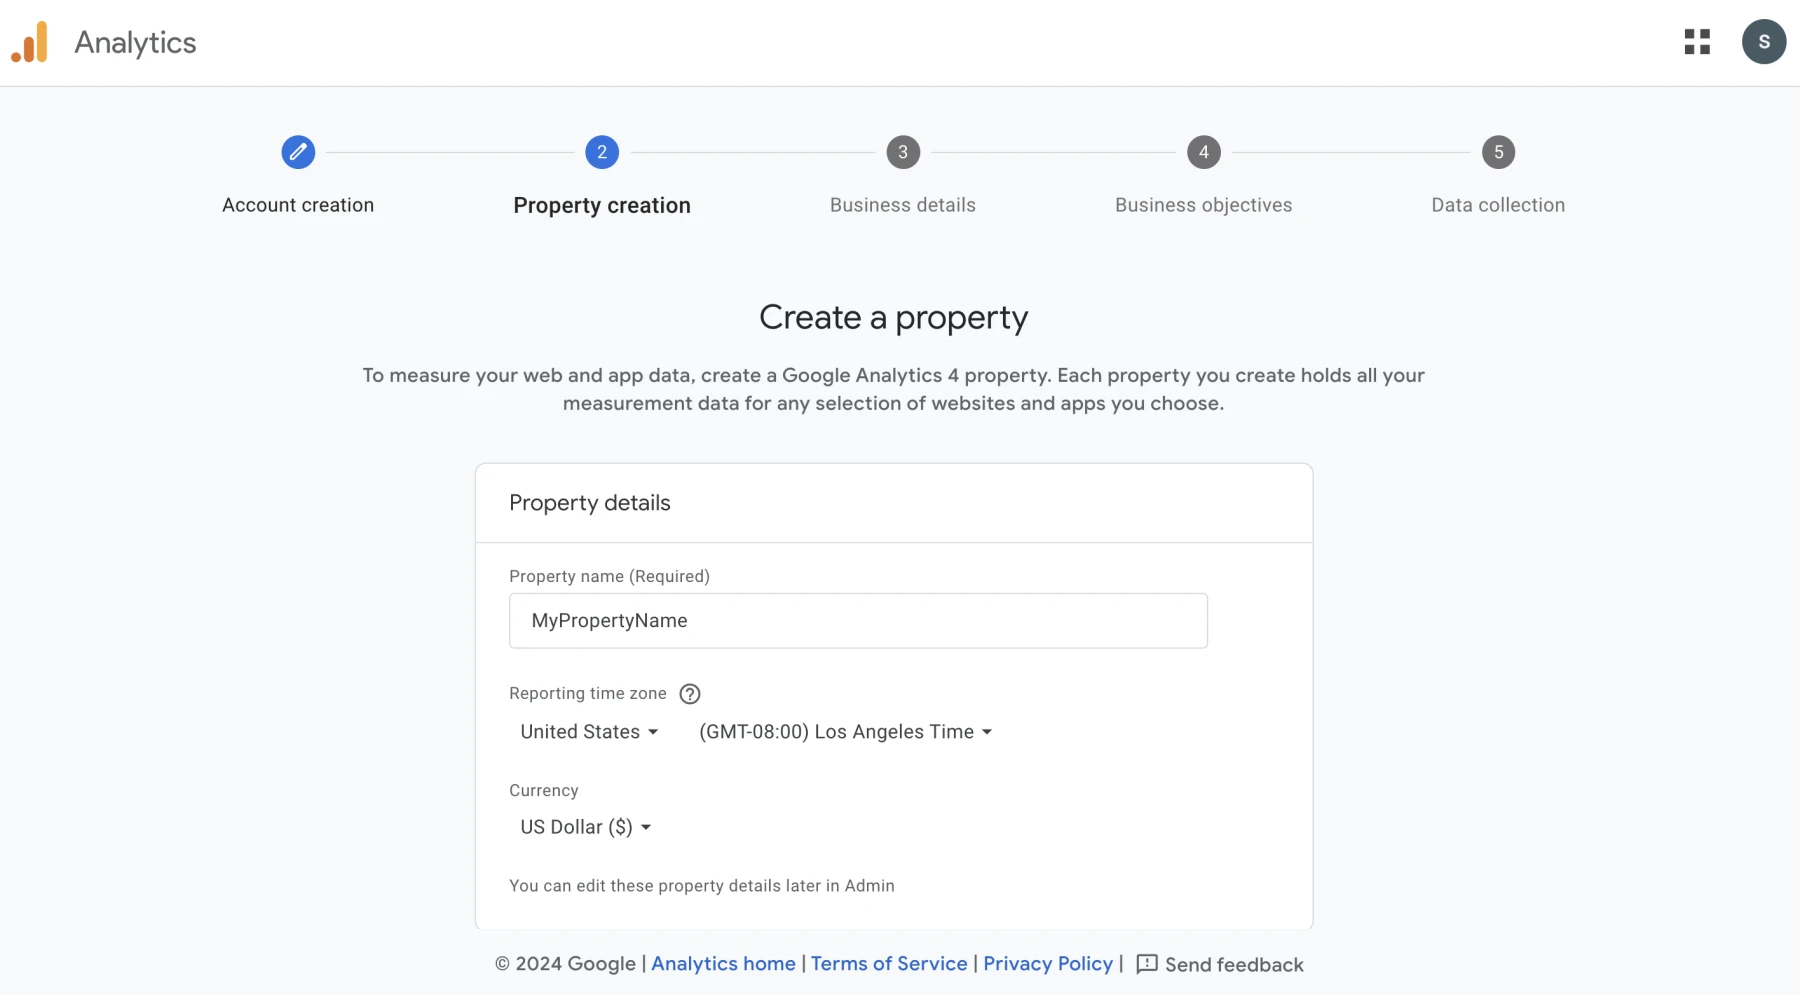
Before you can start leveraging the power of Enhanced Measurements, you need to set up a GA4 property. If you're starting from scratch, log into your Google Analytics account, create an account and select “Create Property.” Fill out the necessary details such as the property name and choose the time zone. Once that's done, you’ll get a tracking ID, which is your gateway to data tracking brilliance.
Navigating to Enhanced Measurement Settings
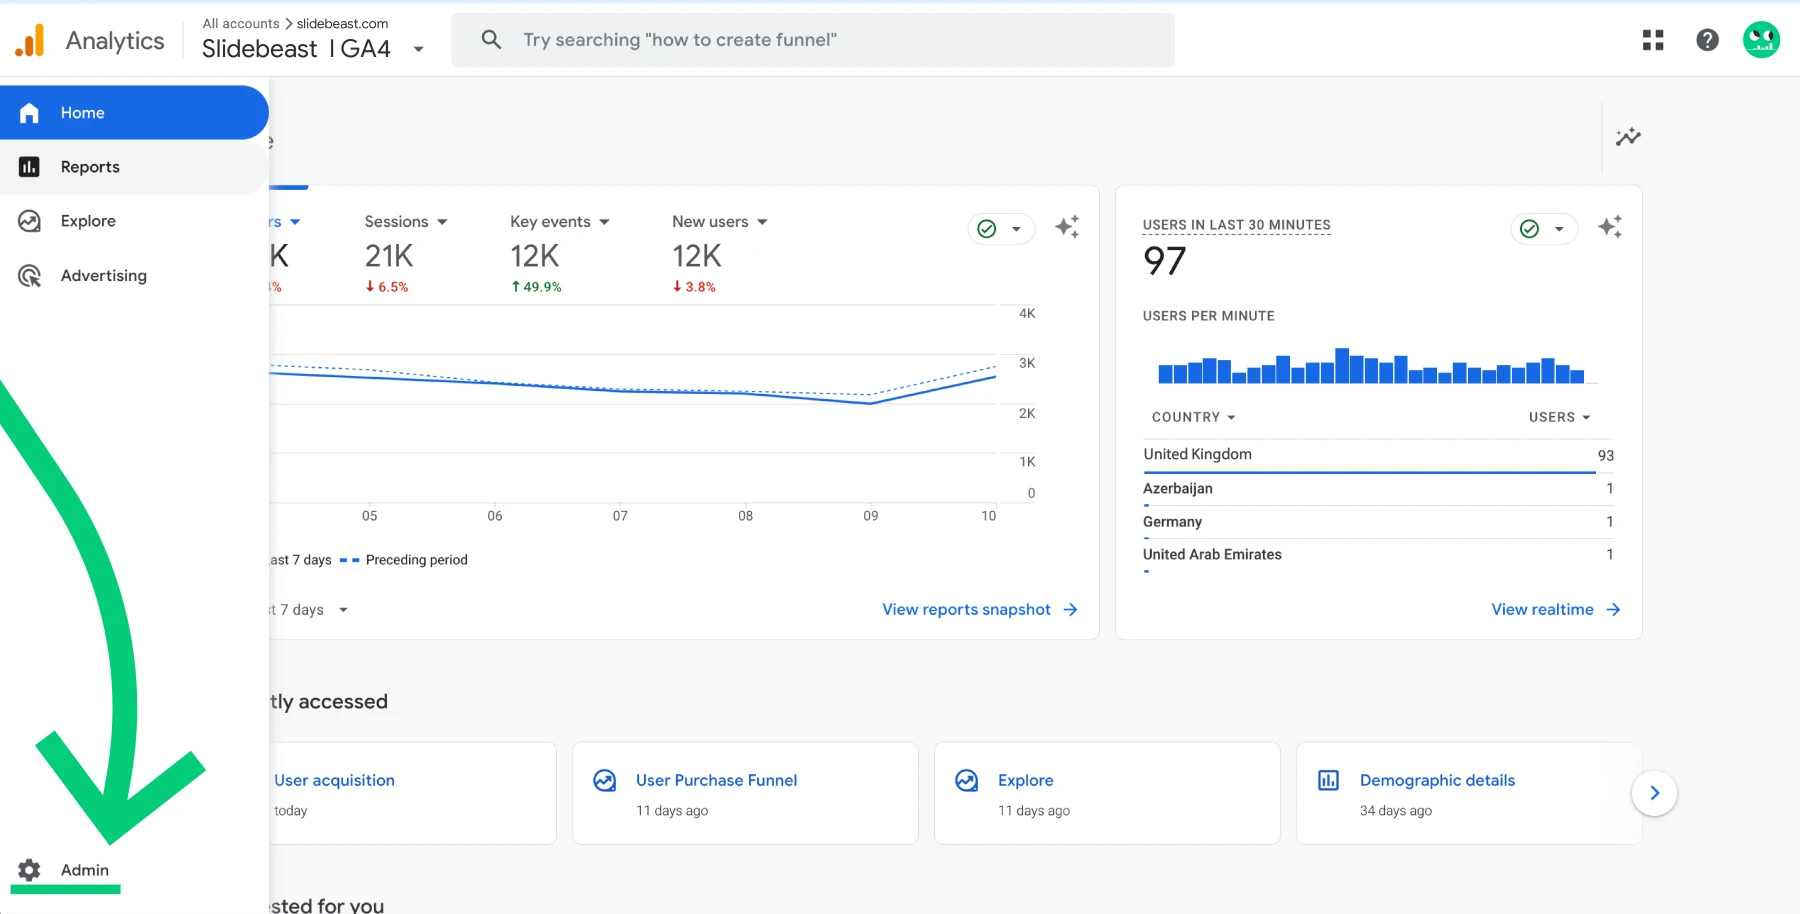
Once your GA4 property is up and running, it's time to navigate to the Enhanced Measurement settings. Go to the “Admin” panel again and make sure your newly created property is active. From there, click on “Data Streams” and select your website's stream. You’ll be directed to a page that details various data capturing options. Enhanced Measurements settings are front and center right here.

Enabling Enhanced Measurements for Your Property
Now for the fun part—turning on Enhanced Measurements. In the Data Streams section, you will see a toggle switch for Enhanced Measurements. Flip that switch, and voila! You'll be presented with a list of all the automatically tracked events. Feel free to customize these according to your tracking needs. Don't worry; the setup is fairly intuitive, allowing you to easily select which interactions you want to track. With a few clicks, you’ll have equipped your GA4 with a powerful, automated analytics toolkit ready to provide deep insights into your website performance.
Customizing Enhanced Measurements
.webp) Setting up Google Analytics 4 (GA4) Enhanced Measurements isn't a one-size-fits-all process. Customization is key to getting the most relevant insights for your website. Let's dive into how you can tailor these measurements to fit your specific needs.
Setting up Google Analytics 4 (GA4) Enhanced Measurements isn't a one-size-fits-all process. Customization is key to getting the most relevant insights for your website. Let's dive into how you can tailor these measurements to fit your specific needs.
Adjusting Event Parameters
Every interaction on your website is valuable. In GA4, you can adjust event parameters to capture the data that matters most. Event parameters are the details about each user action, like page title or user location. Here's how to fine-tune them:
- Identify Key Interactions: Determine which actions on your website are the most significant. Is it a video play, a button click, or a form submission?
- Modify Events: In GA4, navigate to the Events section and choose which events to modify. Here, you can change default parameters or add custom ones to capture specific details relevant to your business goals.
- Test and Validate: After adjustments, it's crucial to ensure they're correctly implemented. Use real-time reports to observe event entries.
Turning On/Off Specific Measurement Features
.webp) Not all Enhanced Measurement features will be beneficial for every site. Knowing what to enable or disable can streamline your analytics:
Not all Enhanced Measurement features will be beneficial for every site. Knowing what to enable or disable can streamline your analytics:
- Review Each Feature: Look at features like scroll tracking, outbound clicks, site search, and video engagement. Consider turning off any feature that doesn’t provide actionable insights or clutters your analytics dashboard.
- Navigate to Admin Settings: Under the Property column in GA4 Admin, click on Data Streams, select your web stream, and then go to "Enhanced Measurement." Here, you can toggle features on or off as needed.
Integrating Additional User-Defined Measurements
For a more detailed picture, you might want to integrate additional user-defined measurements:
- Define Your Metrics: Think about what extra data could aid your decision-making. Maybe details about user demographics or specific interactions?
- Set Up Custom Events: Using GA4's interface, add these as custom events or properties. This requires some setup within your website’s code but offers tailor-made insights.
- Utilize Your Data: Once set up, analyze this data alongside standard measurements to gain deeper understanding.
Validating and Testing Your Setup
Once everything is customized, it's time to validate and test your setup to ensure data accuracy.
Testing Custom Parameters and Events
Testing isn't just a one-and-done deal. Keep checking to ensure your customizations work:
- Conduct Live Testing: Interact with your website as a user would. Monitor the events in real-time through the DebugView to confirm they operate as intended.
- Cross-Check with Reports: Compare what you see in Debug View with actual reports in GA4 to ensure consistency.
Troubleshooting Common Setup Issues
Sometimes things don't go as planned—here's how to troubleshoot:
- Check Your Code: Small errors in your tracking code can cause big issues. Double-check for any typos or missing elements.
- Review Permissions: Ensure that you have the correct permissions set within Google Analytics to access and modify data streams.
- Consult Documentation: Google's support documentation is thorough and can be a great help for more complex problems.
- Seek Community Help: Forums and user communities are often filled with individuals who have faced and solved similar issues.
Testing and validation ensure your GA4 Enhanced Measurements setup not only tracks data correctly but also delivers actionable insights to guide your marketing strategy.
Reporting with Slidebeast
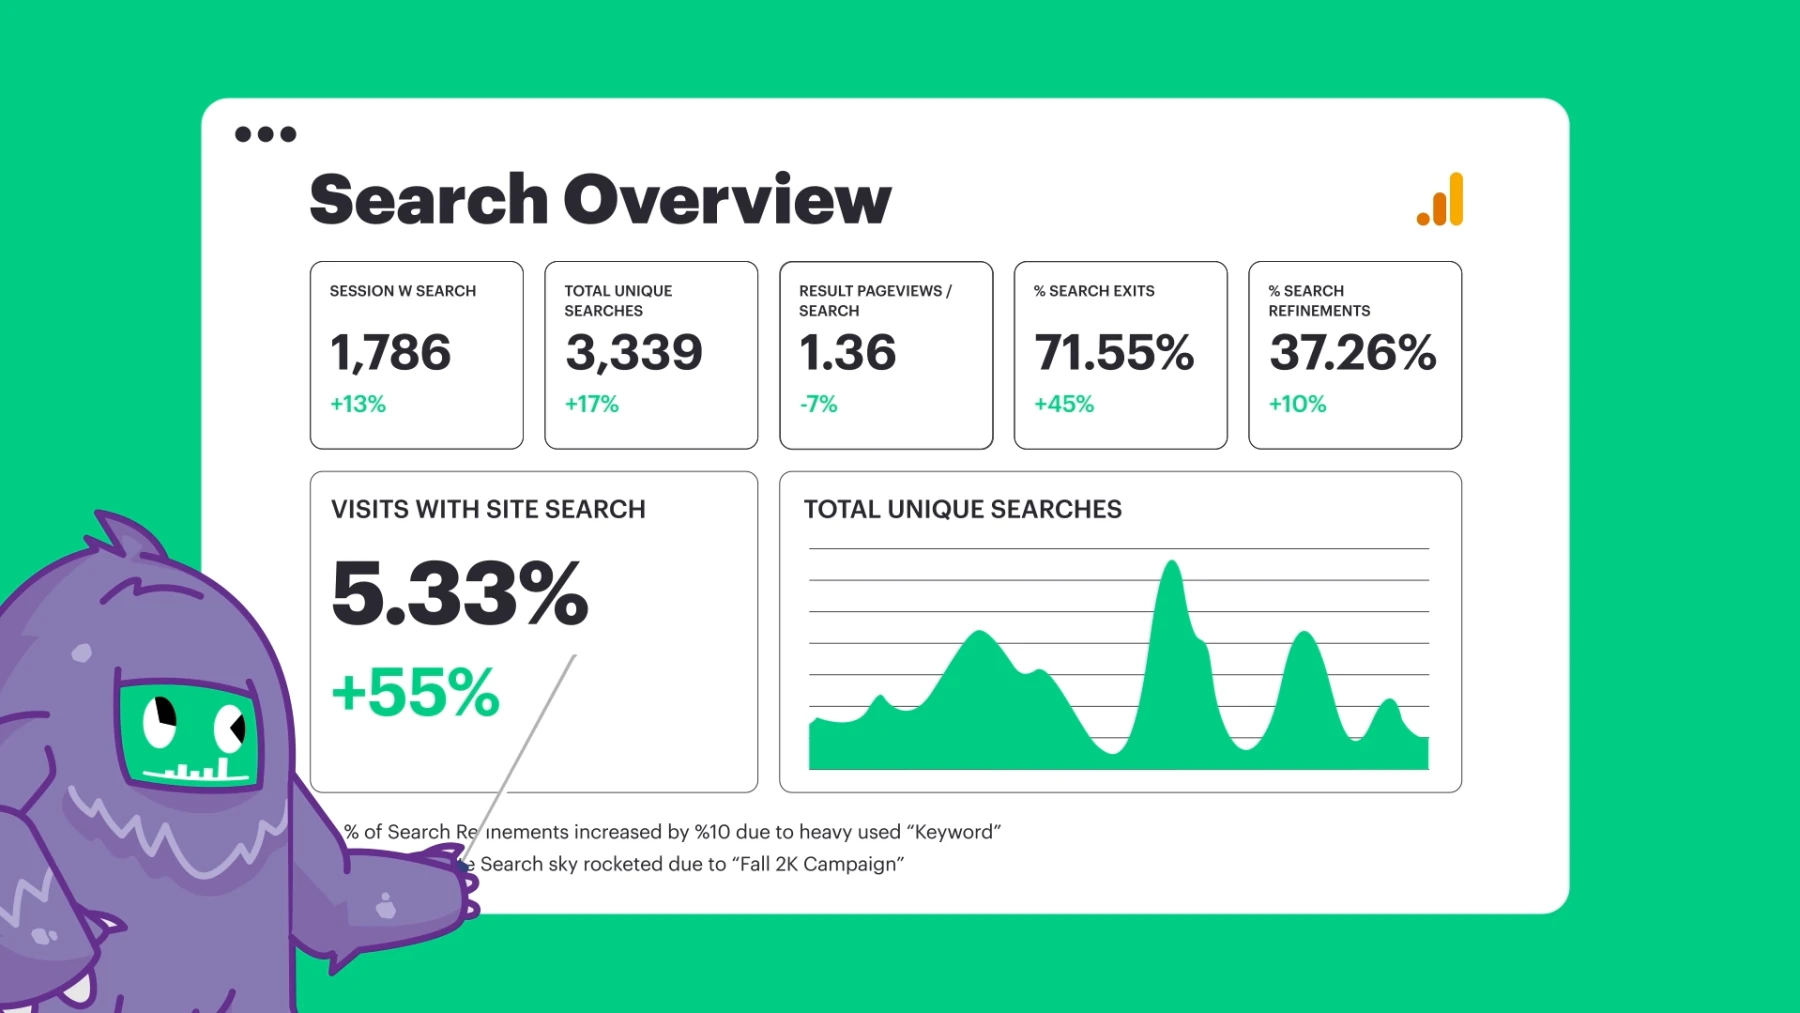
Once you’ve successfully set up Google Analytics 4 Enhanced Measurements, it's time to make sense of all that juicy data. This is where Slidebeast comes into play. Slidebeast simplifies the reporting process, helping you transform raw data into insightful, digestible visuals that are perfect for presentations.
With Slidebeast, you can:
- Create customizable reports that highlight key metrics from GA4.
- Share those PPTX presentations, and schedule them to your inbox.
- Choose from 30+ ready-to-use pre-made report templates including data sources like Google Analytics 4, Instagram, Facebook, and LinkedIn, to save time.
- White-label reports for a branded, professional look tailored to your clients.
By using Slidebeast, you can easily convey complex data in a straightforward way, empowering your team to make data-driven decisions. Whether it's tracking marketing efforts or measuring website performance, Slidebeast smartly integrates with Google Analytics 4, letting you finally make sense of those intimidating numbers.
Creating client-ready marketing reports doesn’t have to be a tedious, time-consuming task. With Slidebeast, you can automate the process, ensuring that your reports are not only accurate and up-to-date but also professional and tailored to your clients’ needs. This allows you to focus on what truly matters—creating impactful marketing strategies and driving results for your clients.
Try Slidebeast today and see how it can revolutionize your reporting process, making it quicker, easier, and more effective. ⚡


